The more people take image processing seriously, the more they need to make adjustments to specific areas of their pictures without affecting the whole thing. This is what selective adjustments are all about.
This can be done in Lightroom with adjustment brushes for sure. Personally though, I prefer to work with custom selections and adjustment layers in Photoshop. I think that it gives me more control on how each adjustment affects the image. Hence, in case you want to manually blend exposures together, it works perfectly fine the same way. Of course, Photoshop is so powerful that there are always several ways to achieve the same result and using a specific tool instead of another one is a matter of personal choice more than anything else.
The power of selective adjustments in Photoshop is undeniable: the layers system makes every adjustment totally non destructive and you always have the ability to go back to your image and re-edit each of your adjustments separately.
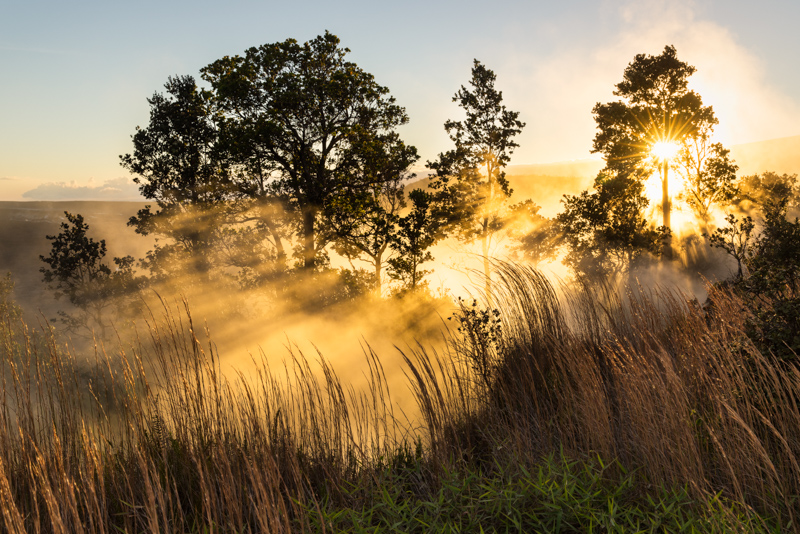
Let’s process an image to illustrate how to make selective adjustments in Photoshop using custom selections. For this purpose, I chose a photograph I took in Hawaii, in Volcanoes National Park, in October last year.
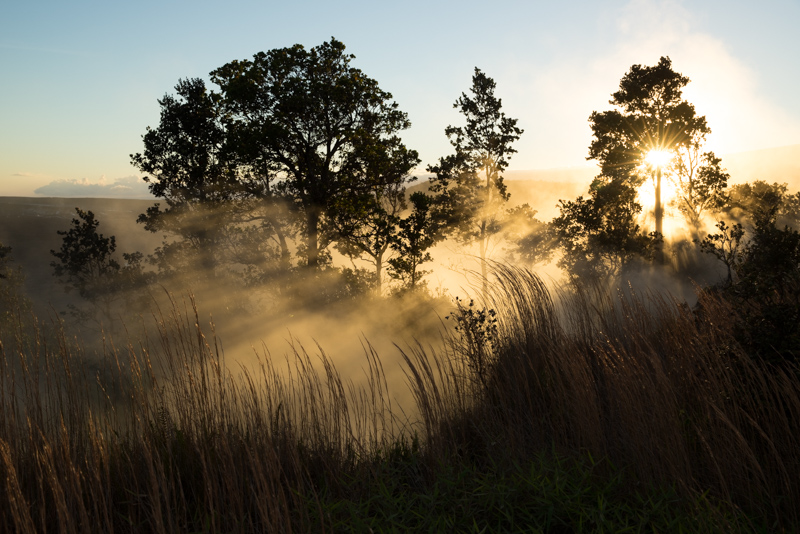
This shot was taken with my Sony A7R and a Canon EF 24-70mm f/2.8 L II lens (with a Metabones EF to E mount). Settings were: ISO 200, 1/160 s @ f/10 in manual mode. I also used a soft 0.6 GND filter (graduated neutral density) and the camera was, of course, set on my tripod. If I ever had to take the same shot again, I would use a smaller aperture in order to achieve a nicer starburst. But I had to think fast before the sun disappeared behind the hill and didn’t pay much attention to the starburst.
In the original image, the sky looks pretty much OK but the foreground is way too dark and the rays of light through the fog should pop a little more. So, how to do that in Photoshop?
1. Import the file in Photoshop
Before importing the file, I always do a few basic adjustments: white balance, exposure, contrast, highlights and shadows, presence, vibrance and lens profile correction most of the time. I use Lightroom but any RAW converter is perfect.
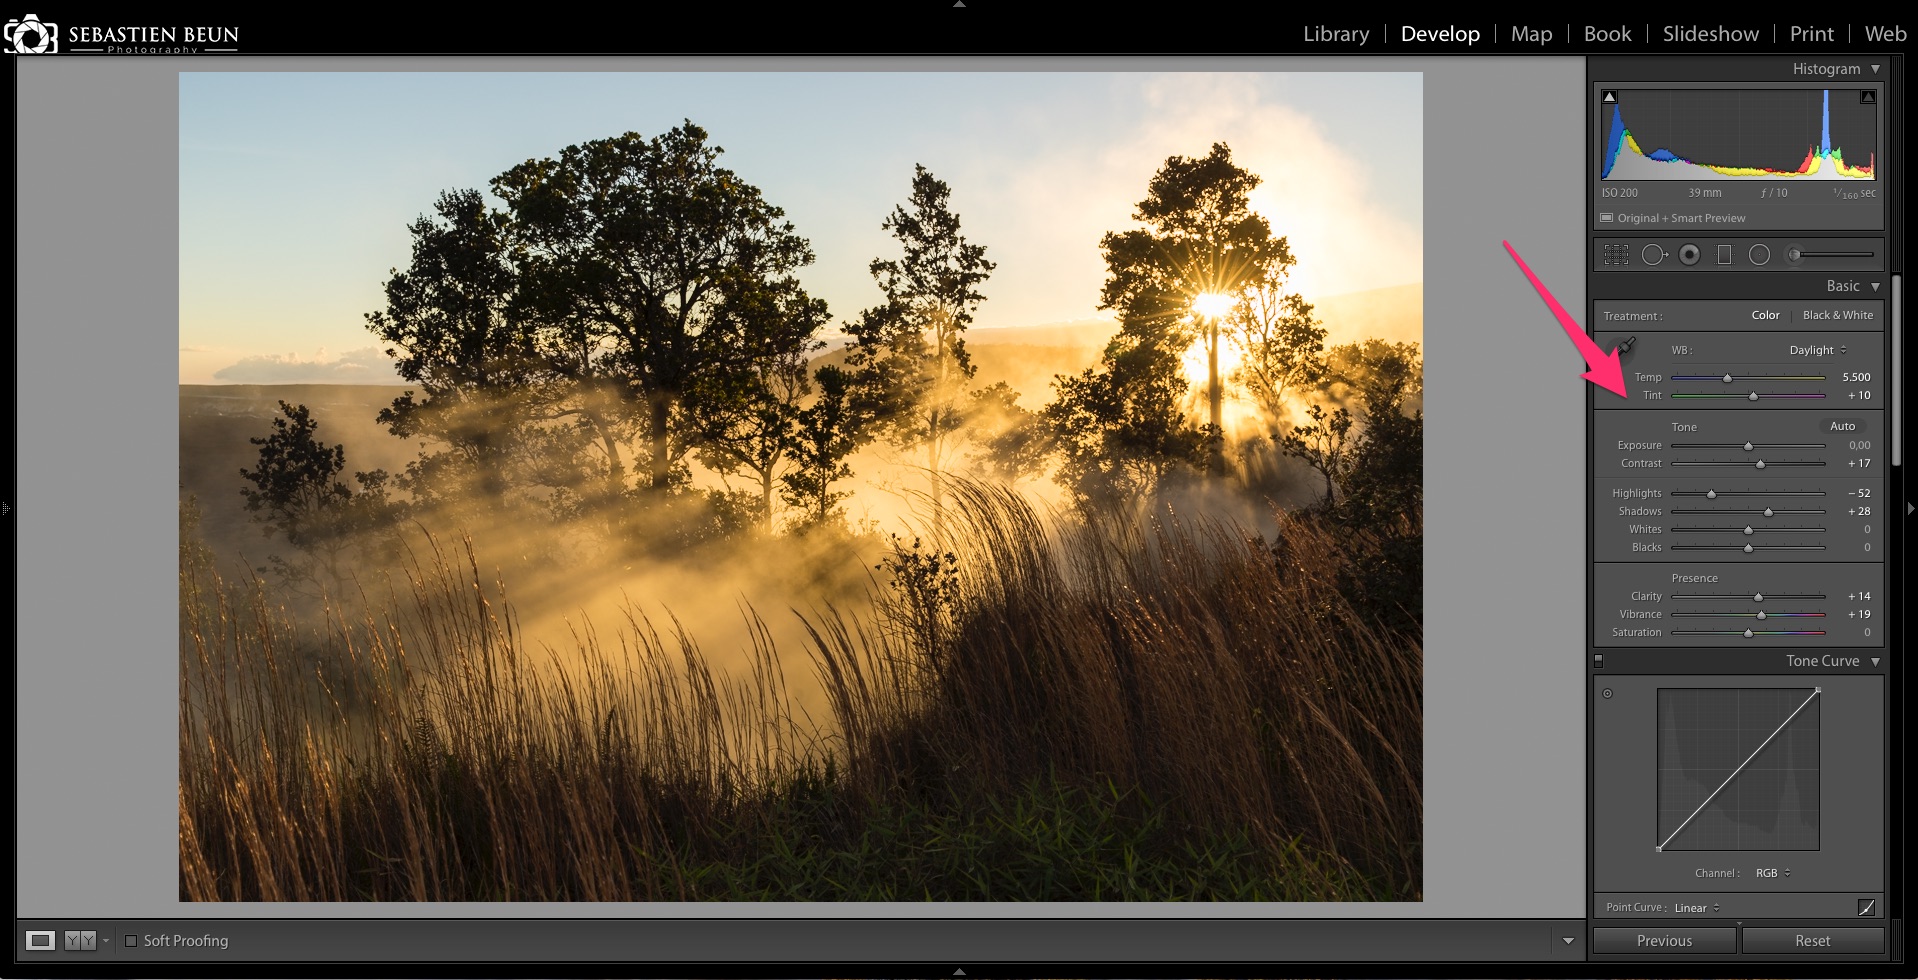
Here I already cropped the photo a little, darkened the highlights and lightened the shadows. But the foreground is still too dark and the rays of light should pop a little more.
2. Select the area you want to adjust
Once the picture lies in Photoshop, select the area you want to adjust. There are several ways to do it but I use the lasso tool most of the time. The selection doesn’t need to be ultra precise; don’t worry about that. In this case, I selected the foreground which is still a bit too dark.
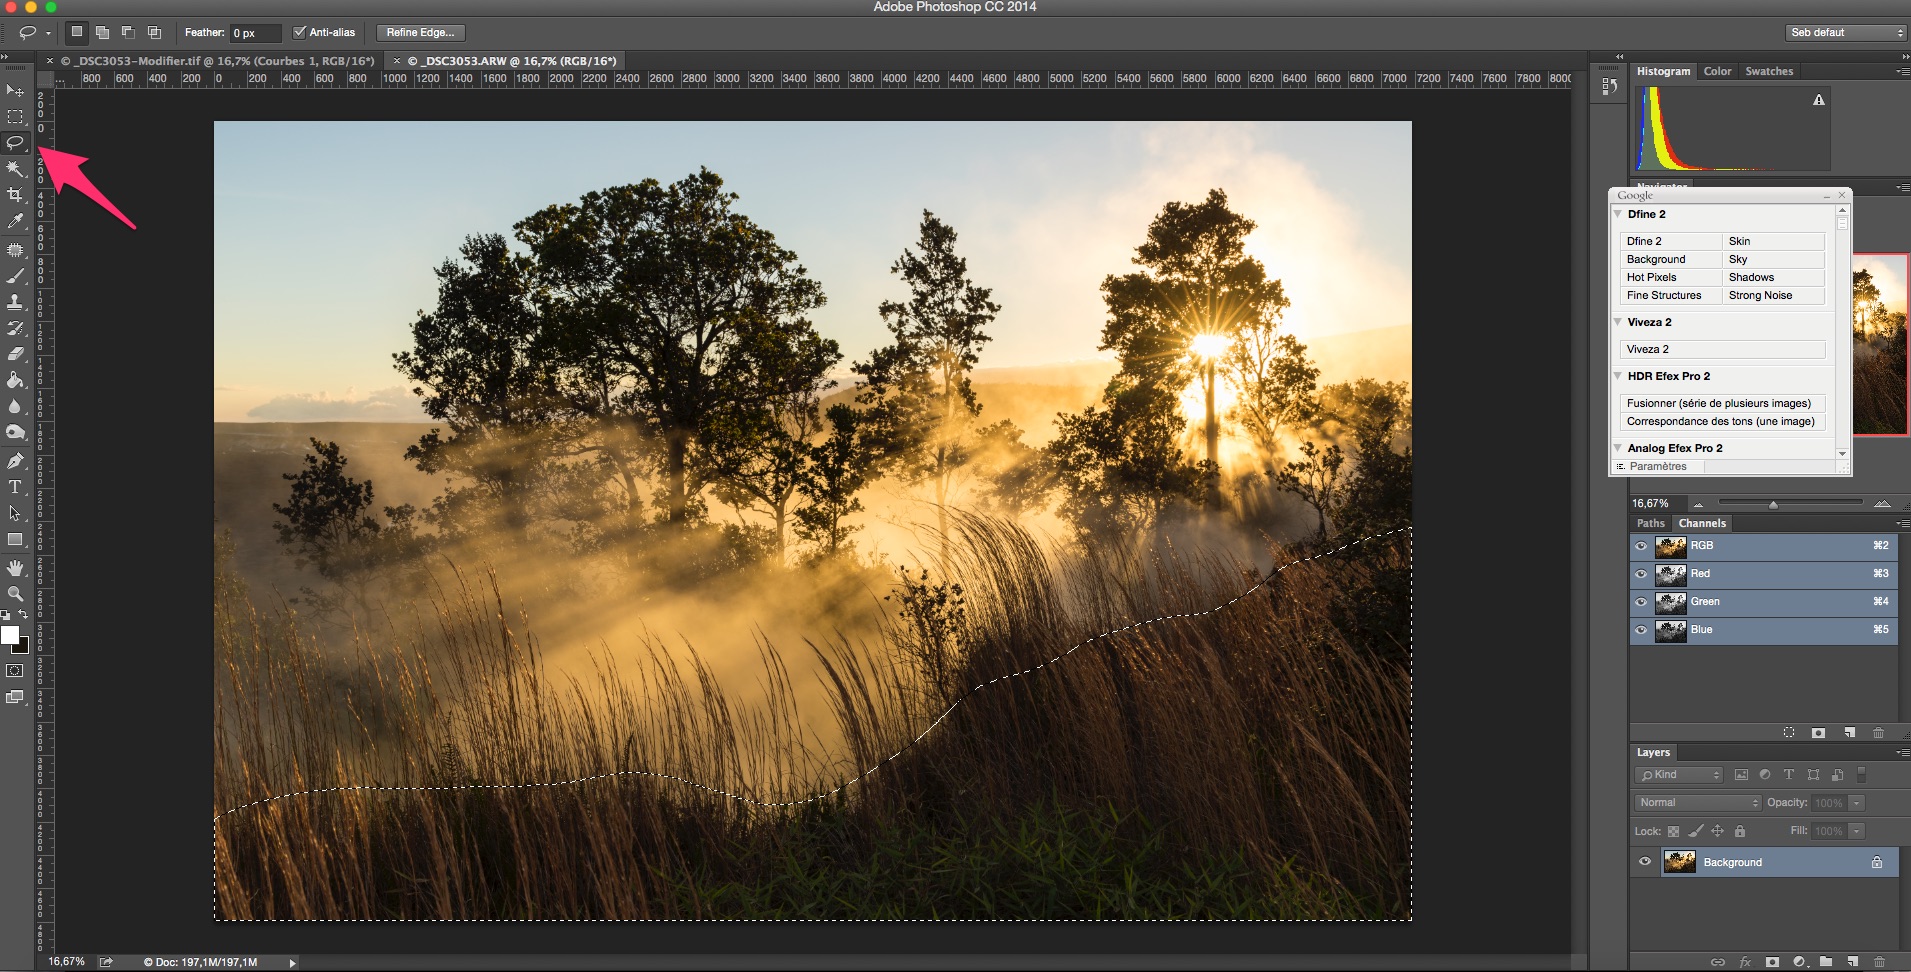
Then, in order to get a smooth transition between the selected are and the rest of the image, we need to refine the edges of the selection so that we can blur them a little. To do that, simply click on “refine edge” at the top of the working space or, in the menu, go to “select”, then “refine edge”.

There is a dialog box that opens. Use the “feather” slider to blur the edges of the selection. There is no rule here; just make sure that you have blur enough so that there is a seamless transition between the effect that will be applied to the selection and the rest of the image. You can also use the “shift edge” option in the dialog box to fine tune the size of your selection (blurring the edges tends to enlarge the selection a little).
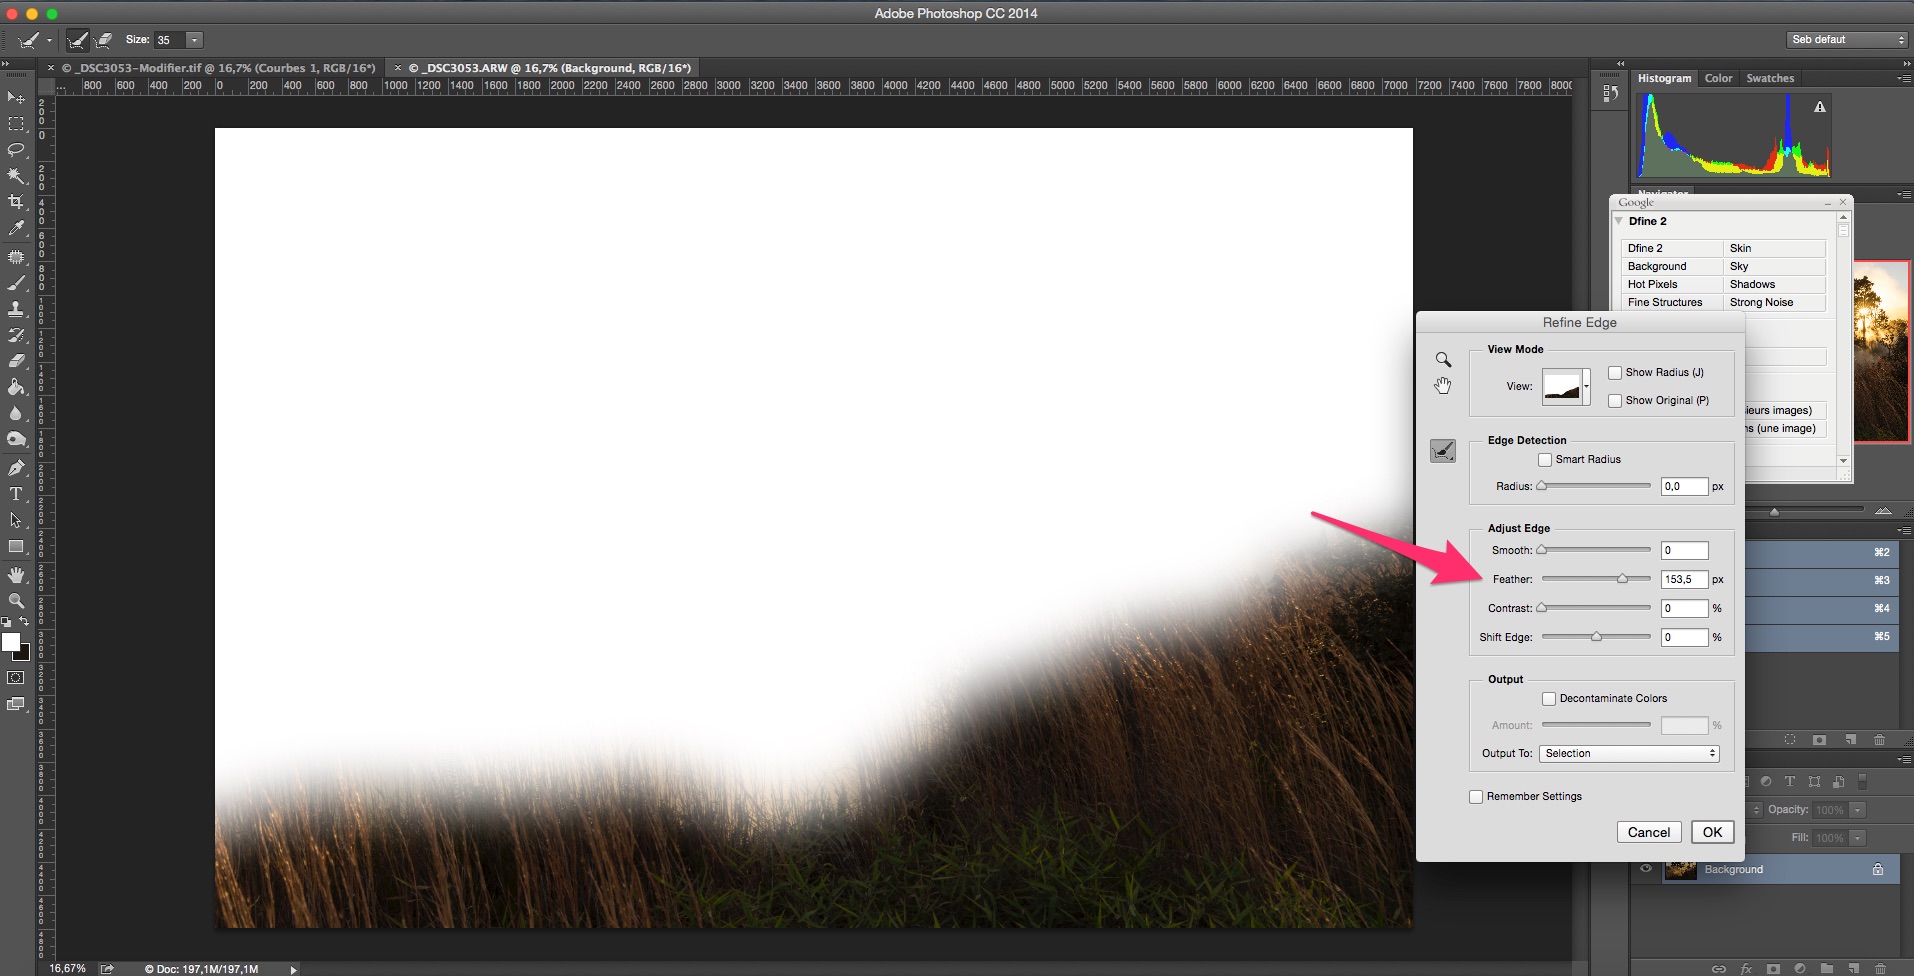
Once you’re happy with the result, click “OK”.
3. Create an adjustment layer
Now that you have a neat custom selection, it’s time to create and adjustment layer based on your selection. This is very simple. Simply click on the “create new fill or adjustment layer” that is located on the lower right corner of the working space or, in the menu, go to “layer”, and then “new adjustment layer”.
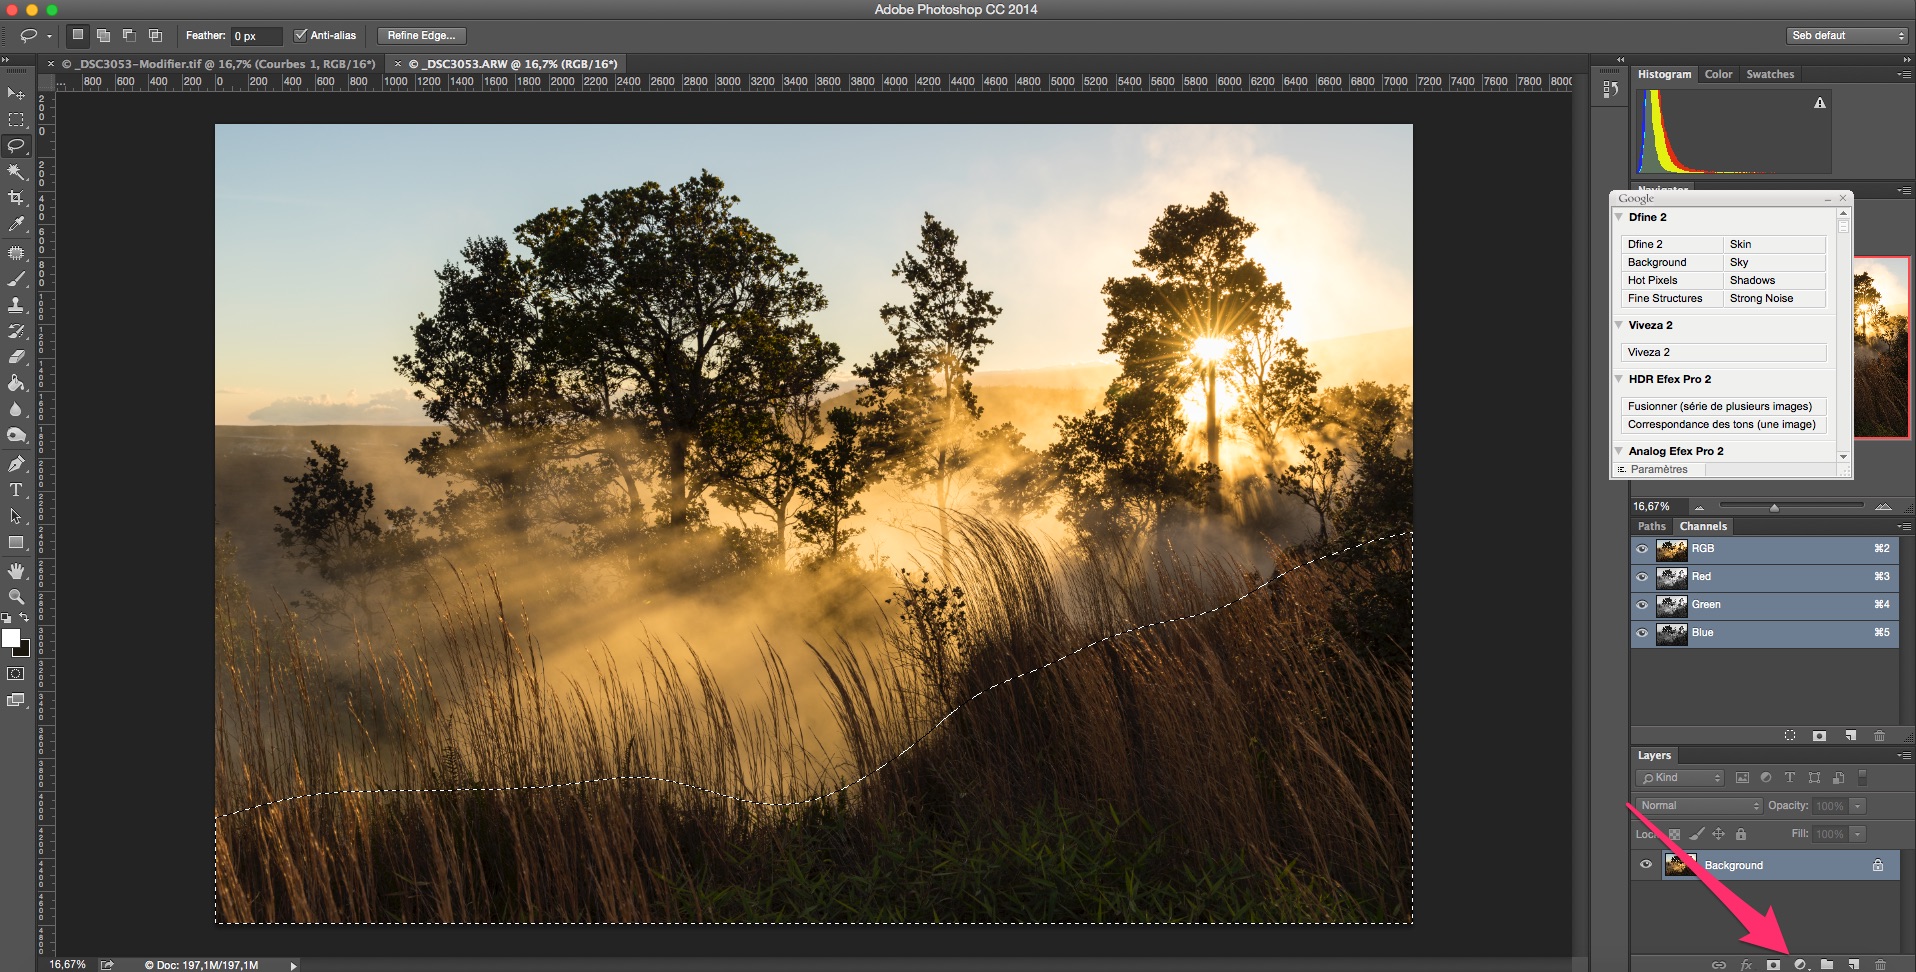
Select the type of adjustment you want to make. Most of the time, I use the curves adjustment layer but you can of course adjust whatever you want. You will see that a new layer is created with a mask that corresponds to your custom selection. In the adjustment layer dialog box, you can do your fine tuning and it will only affect the selected area. In our example I have lightened the whole selection a bit to bring up the details in the foreground.

And that’s it! You have now learned how to use custom selections to make selective adjustments to your images seamlessly in Photoshop. You can of course add as many adjustment layers as you want! It’s absolutely non destructive and you can always go back and modify the previous adjustments, delete a layer or change the opacity of a layer if you suddenly feel that went a bit too far in your processing.
In our example, I made a few additional selective adjustments on the rays of light and the sky. You can see the final photo in high resolution here.
Don’t hesitate to drop a comment below or shoot me a message if you have any question. I’ll be more than happy to help!
Happy processing!
Enjoyed this? Share it!
Share this post with your friends: